Friday, April 20, 2012

It's Killin Time!!!!

 It was also referred to as Chicky Chicky Bye Bye time! So Saturday was the BIG day. After 8 weeks of feeding and watering these Jumbo Cornish X's it was finally time to reap our rewards. The first step was to set everything up, which we did the night before we had scalding pots, killing cones and a chicken plucker.
Got the coolers cleaned up and the processing table nice and clean.


Here is us scalding the birds after killing them in the cones.


Here is a video of the plucking. Sorry it's not very good video chicken plucking is like watching a car crash you just can't not watch.

After they were plucked there were rinsed off and gone over for any leftover feathers. Then placed into coolers with lots of ice.


Once we were done with stage one(killing,scalding and plucking) we moved on to stage 2. This part involved removing necks and gutting. Once that was done we were left with some great looking chicken!


Now to stage 3. I purchased some poultry shrink bags and they were awesome. You put the chicken in the bag and then twist it and zip tie it. Then a 3 second dip in 200 degree water and you are done!


The next night we grilled one that got carried away in the scalder.


The whole process took from about 8-6. It really wasn't that bad considering there were only 3 people helping. With one or two more people it would have been a breeze.

So there you go we have now done what most people thought we were just joking about. It's pretty cool to look into a slammed full chest freezer and know that you provided that food from beginning to end!

As for the financial part of the whole thing. Not including the chicken tractor or plucker since their cost will be spread out among an unknown amount of birds over time.

18 bags of feed @ $13.50 ea. = $243.00
50 birds(only 45 lived the whole 8 weeks) $122.40
Total cost $365.50

Average weight per processed bird 5.5 lbs

Avg. Cost = $1.48/lb.

I think that is pretty dang good!

Wednesday, April 11, 2012

My Whizbang Chicken Plucker

As you may or may not know a few weeks ago I ordered the book by Herrick Kimball "Anyone Can Build A Tub-Style Mechanical Chicken Plucker ." It was pretty fun to build but I got tired of forgetting to by this or that bolt and having to keep going back to the store. I highly recommend these plans if you are interested in building one. There are a lot of different parts for this thing and some are easy to find and some you can purchase from Mr. Kimball. The initial frame was pretty simple and there is a local Soy Sauce plant that has free 55 Gallon plastic Barrels. I also already had an electric motor from my Apple Crusher.

The first step was to build the frame.


Then cut the barrel

and drill the holes for the fingers

This is what the fingers look like. The fingers do the pluckin.

Then I put the figures in the holes I drilled in the barrel

My buddy cut this out for me and drilled the holes. So I saved about $100 on this piece.

After drilling the holes they were tapered


Then the fingers were pulled through. This was supposed to be the hard part but I didn't have any trouble with it. This plate goes in the bottom of the barrel and spins.


And this is what the top view looks like after the feather plate was installed under the tub.


Here is a picture from from the underside minus this belt. The large pulley is driven by the electric motor. It is connected to the feather plate by a shaft the is bolted to the plate.


 And here is the finished product. It will be put to use this weekend.


Thursday, April 5, 2012

Guineas are here!

The property we are moving to is covered in ticks. I have never been in woods as tick filled as these are. So after such a mild winter I had to do something. I want to be able to enjoy being outside and not have to cover myself with spray. My solution was to order a boat load of Guineas. I ordered 30 but will be selling 10 of them. I hadn't planned on getting them till this summer but I was looking on McMurray Hatcheries site and saw that if you ordered the guinea assortment you could get them now. So I did. The description of the assortment says "The varieties will be our choice but we will guarantee you at least three different kinds from this group: Pearl, White, Lavender, Purple, Coral Blue, Buff, Buff Dundotte, Porcelain, Opaline, Slate, Chocolate, Powder Blue, and Brown."

I like the idea of having a bunch of different colors. Hopefully these birds will live up the their reputation of being able to put a dent in a tic and bug population.

They arrived this morning and I could hear them chirping as soon as I walked into the Post Office. They are MUCH louder than chickens.

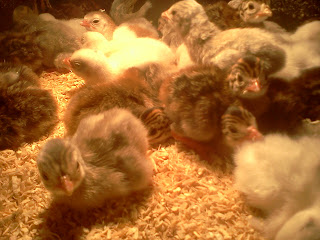
Here are a few pictures.

They were very loud and unsure at first.
After they ate and drank they all passed out.

The white and brown one is my favorite.

I don't know how they breathe when they lay on each other like this.


Monday, April 2, 2012

Seed starting and Garden Building

As you know we are building a new house. We should be in by the end of May. This time frame make it hard to get a garden in this year since we currently live an hour from where we are building.

One way or another I am going to make it work! I went all out when purchasing our seeds from Southern Exposure Seed Exchange. I may have went overboard but we will see. He is what I bought.

1 x Rose Gold, 1 lb SEED POTATO (39401)
1 x Kentucky Wonder (Old Homestead) BEAN, SNAP (POLE) 28 g (13503)
1 x Early Flat Dutch Cabbage 2g (22101)
1 x Danvers 126 Carrots 3g (35103)
1 x Silver Queen - hybrid Sweet Corn 28g (41901)
1 x Dynamite CORN, POPCORN 28 g (41610)
1 x Straight Eights CUCUMBER 2 g (51107)
1 x Georgia Green COLLARDS 2 g (24101)
1 x Bloomsdale SPINACH 5 g (67105)
1 x Forellenschluss LETTUCE, ROMAINE 0.5 g (62705)
1 x Crimson Sweet, Virginia Select WATERMELON 3 g (55118)
1 x JalapeƱo PEPPER, HOT 0.5 g (46508)
1 x Connecticut Field PUMPKIN 5 g (53113)
1 x Early Prolific Straightneck SQUASH, SUMMER  4 g (53101)
1 x Zucchini, Dark Green SQUASH, SUMMER  4 g (53106)
1 x Roma VF, Virginia Select TOMATO 0.16 g (49235)
1 x Homestead 24 TOMATO 0.16 g (49121)
1 x Cilantro (Coriander) - Herb 1g (71216)
1 x Rosemary - Herb 0.1g (71239)
1 x Autumn Beauty SUNFLOWER, ORNAMENTAL 4 g (05301)
2 x Yellow Sweet Spanish ONION, DRY BULB 3 g (66103)
1 x Country Gentleman (Shoepeg) Sweet Corn 28g (41104)
1 x Beauregard - 6 Slips (74102a)

Yeah I know, It's a lot! I don't care. I enjoy it and I hope that I have more than I can handle and we will have a pantry full of canned veggies with plenty left over to share with family and neighbors.

My plan at this point is to have 2 gardens. One will be a 20x40 Raised bed garden consisting of 8 4'x10' beds and 1 4'x7' bed.

Raised Bed Garden
(Herbs, Carrots, Lettuce, Collards, Onions and Spinach)

Food Plot Garden
(Corn, Sunflowers, Pumpkins, Tomatoes, Peppers, Squash, Zuchini and Watermelons)


This one is named the Food Plot Garden because in the fall and winter it will be planted for the deer.

I have spent the last few weeks trying to get these two areas ready to be gardens. Living so far away has not allowed alot of time but I am happy with the progress I have made.

First off was to start some seeds inside. I started Onions, Lettuce, Tomatoes and Cabbage.

Once they grew their first true leaves I moved them from starter  trays to plastic cups with soil in them.
I have now started to put them outside for a couple hours a day to harden them off before I move them to the garden in the next few weeks. 

While the plants continue to grow I have started to till up some ground. I started with the raised bed garden. This is next to the house and its good dirt but lots of roots because just a few months ago this was woods. The plan he is as I posted above to be a raised bed garden with a 3 board fence around it to keep out the Deer and other critters. So far we have the fence post all set and have started putting the cross boards up.


I've only got 1 bed built at this point so I still have a lot to do here. I don't want to plant anything in here yet until I get the boards up so that he deer dont get in there and ruin my plants.


Next it to get the Food Plot Garden ready, as if the first one wasn't enough work! This one is 60'x60'. This ground has been worked over pretty goods the last few years so the roots aren't too bad.


I have ran the tiller over it once so far and it wasn't bad at all.


I will run over the whole thing again before I plant. Also I have ordered deer netting to go around this garden since it is pretty much in the middle of the woods.

So that is were we stand on the garden situation. We still have a lot to do but are making good progress and I expect to have everything planted on time.

Broiler Bird Update

So far they have gone through 9 50# bags of feed and have gotten huge. I weighed a bird the other day and it was 4 lbs 11oz. They are no 6 weeks old and I estimate them to be over 5 lbs as an average. There are a few birds that are a little bigger and 1 or 2 that are a little smaller. By having this may birds it requaires moving the tractor twice a day as well ans filling 2 big feeders 2 or 3 times a day.


I upgraded the wheel system on the tractor to make it raise and lower earier and it is much more sturdy now. I used 1" square aluminum tubing and it has made a big differnce. In this picture it is in the up position which raises the tractor up and pts the wheels on the ground.


Things I've made for May

To not expose the name we've picked for our baby we will be referring to her by her due month, May.
Since I have a real passsion for crocheting I decided I would try and make May some cute stuff! Now keep in mind I have never made anything other than blankets, scarfs, and hats before so this was all new to me! As far as following a pattern I get lost just looking at them so this was all from my head and I have to say it was a little challenging at times but ultimately it's fun to me so I really enjoyed it. Also It will be so rewarding when I see May wearing everything I've made for her!! I hope you enjoy!
The first thing I made was a sack to put her in with a matching hat!
The next thing I made is a sweater! This was the most difficult thing I made just because I had to figure out how I was gonna make each peice and then work them together but now that I know It wouldn't be difficult to make again.
Next was this Jumper which I think is my favorite! This wasn't difficult at all and I was actually able to make it all in one piece. You can't see the back but the straps criss cross! Also these buttons are hand painted porcilen buttons my mom got for me and since they were so cute and matched I couldn't help but use them!
The last thing I've made for her is this dress. Its pretty much a tube top but with straps. Also as you can see I used some more of the porcelin buttons! They are just too cute! As far as making this one it was very easy and all one piece! I can't wait till our sweet baby girl gets here so I can dress her up in these outfits!
While I was making all of theses I also made her a huge pink blanket lined in white, but I'm not going to post that one because I crotched her name in the corner of it! But for the record it came out great looking and I know it's something she would snug with for years to come!